Comments

johnebaker wrote on 1/9/2021, 9:36 AM

@Frank-Hough

Hi

There are several ways of doing this - the simplest is using the Effects, Size & Position effect.

Use the slider at the bottom of the effect dialog and the drag the image around in the Preview monitor to place the subject as you wish

Note if you want to zoom into a portion of the video and the out again you need to learn about Keyframing - there are tutorials on this in the Tutorial section of the forum, here is one example, and also many on Youtube - it does not matter whether which version of Movie Edit Pro (or Video Pro X) both programs use the same principle.

HTH

John EB
Forum Moderator

Last changed by johnebaker on 1/9/2021, 9:36 AM, changed a total of 1 times.

VPX 16, Movie Studio 2025, and earlier versions 2015 and 2016, Music Maker Premium 2024.

PC - running Windows 11 23H2 Professional on Intel i7-8700K 3.2 GHz, 16GB RAM, RTX 2060 6GB 192-bit GDDR6, 1 x 1Tb Sabrent NVME SSD (OS and programs), 2 x 4TB (Data) internal HDD + 1TB internal SSD (Work disc), + 6 ext backup HDDs.

Laptop - Lenovo Legion 5i Phantom - running Windows 11 24H2 on Intel Core i7-10750H, 16GB DDR4-SDRAM, 512GB SSD, 43.9 cm screen Full HD 1920 x 1080, Intel UHD 630 iGPU and NVIDIA GeForce RTX 2060 (6GB GDDR6)

Sony FDR-AX53e Video camera, DJI Osmo Action 3 and Sony HDR-AS30V Sports cams.

Frank-Hough wrote on 1/9/2021, 10:45 AM

Many thanks for quick response John I will try

Frank

terrypin wrote on 1/9/2021, 4:54 PM

And also there’s a more detailed tutorial here. Its methods remain essentially unchanged in all versions of MEP.

https://www.magix.info/us/tutorials/how-to-create-ken-burns-effects--858590/

Terry, East Grinstead, UK. PC: i7 6700K, 4.0 GHz, 32GB with Win 10 pro. Used many earlier versions of MEPP, currently mainly MEPP 2016 & 2017 (Using scores of macro scripts to add functionality, tailored to these versions.)

AAProds wrote on 1/9/2021, 9:17 PM

@Frank-Hough

The Section effect allows you to visually set the area to be zoomed-in-on. You can change the shape of the section using the dropdown list. To preview your section, click the Preview button upper right.

Getting further into the Ken Burns effect, the Zoom function in "Camera Zoom shot" (middle bit) works really well to keep things simple without manually setting keyframes: you set the start or end section, then simply click "to section" or "from section" and MEP will set up the pan/zoom for you.

The beauty of the Section effect is that, once you have "sectioned" your image/video, you can then apply Size and Position to move it around with keyframes.

Reset the effects by clicking the inward-pointing double arrow, top right. Any remaining active effects will be named on the timeline next to the file name.


Last changed by AAProds on 1/9/2021, 9:18 PM, changed a total of 1 times.

All my forum comments are based on or refer to my System 1.

My struggle is over! I built my (now) system 2 in 2011 when DV was king and MPEG 2 was just coming onto the scene and I needed a more powerful system to cope. Since then we've advanced to MP4 and to bigger and bigger resolutions. I was really suffering, not so much in editing (with proxies) but in encoding, which just took ages. A video, with Neat Video noise reduction applied, would encode at 12% of film speed. My new system 1 does the same job at 160% of film speed. Marvellous. I'm keeping my old system as a capture station for analogue video tapes and DV.

System 1

Windows 11 v23H2 severely modified by Openshell and ExplorerPatcher

Power supply: 850W Cooler Master (should have got modular)

CPU: Intel i7 13700K running at 3400mhz, cooled by a Kraken 2x140mm All In One liquid cooler.

RAM: 64gb (2x32gb sticks) G.Skill "Ripjaws" DDR4 3200Mhz

GPU 1: iGPU UHD 770

GPU 2: NVidia RTX 3060Ti Windforce 8gb

C drive: NVME 500gb

Bluray Burner: Pioneer BDR-212D

Various other SSD and HDDs.

Monitor: 27"/68cm Samsung, 2560 x 1440, 43 pixels/cm.

MEP 2021 version 20.0.1.80

Movie Studio 2025

Magix Video Easy version 7.0.1.145

System 2

(Still in use for TV and videotape capture)

Windows 10 v22H2

CPU: i5-750 at 2670mhz with 12gb RAM

Onboard IEEE1394 (Firewire) port

GPU: ATI Radeon HD 4770 (512mb) which is ignored by MEP

Hard drives: C Drive 256gb SSD, various other HDDs.

Monitor: Dell 22"/56cm, 1680x1050, 35 pixels/cm

MEP 2021 version 20.0.1.80

Movie Studio 2023 version 22.0.3.172

VPX 12

Frank-Hough wrote on 1/10/2021, 6:36 AM

And also there’s a more detailed tutorial here. Its methods remain essentially unchanged in all versions of MEP.

https://www.magix.info/us/tutorials/how-to-create-ken-burns-effects--858590/


Frank-Hough wrote on 1/10/2021, 6:47 AM

Thank You. I have achieved what I wanted to do by following your instructions and using cookie cutters to create a mask. I was going to send a screen print of my achievement but don't know how to attach an image to my reply. I have only been using MEP for 2 weeks so having to learn fast, although have been video editing for about 12 years. My last editing programme was MovieplusX6 and in that I could overlay with a picture-in-picture and my zooms would be confined to the orifiginal size of my p-i-p. That is what I am trying to do. However many thanks for your suggestions it has been a great help

Frank


johnebaker wrote on 1/10/2021, 9:06 AM

@Frank-Hough

Hi

To post images or short video clips use the upload media icon, above the text box when replying.

HTH

John EB

VPX 16, Movie Studio 2025, and earlier versions 2015 and 2016, Music Maker Premium 2024.

PC - running Windows 11 23H2 Professional on Intel i7-8700K 3.2 GHz, 16GB RAM, RTX 2060 6GB 192-bit GDDR6, 1 x 1Tb Sabrent NVME SSD (OS and programs), 2 x 4TB (Data) internal HDD + 1TB internal SSD (Work disc), + 6 ext backup HDDs.

Laptop - Lenovo Legion 5i Phantom - running Windows 11 24H2 on Intel Core i7-10750H, 16GB DDR4-SDRAM, 512GB SSD, 43.9 cm screen Full HD 1920 x 1080, Intel UHD 630 iGPU and NVIDIA GeForce RTX 2060 (6GB GDDR6)

Sony FDR-AX53e Video camera, DJI Osmo Action 3 and Sony HDR-AS30V Sports cams.

terrypin wrote on 1/10/2021, 9:15 AM

Hi Frank,

To attach each image to this post, here is what I did:

... but I see John pipped me to the post!

Terry

Last changed by terrypin on 1/10/2021, 9:17 AM, changed a total of 1 times.

Terry, East Grinstead, UK. PC: i7 6700K, 4.0 GHz, 32GB with Win 10 pro. Used many earlier versions of MEPP, currently mainly MEPP 2016 & 2017 (Using scores of macro scripts to add functionality, tailored to these versions.)

Frank-Hough wrote on 1/10/2021, 10:39 AM

Hi Terry and John

I am learning so much today. here are the beginning and end shots of my zoom in MEP

and here are the beginning and end shots in my MoviplusX6. You can see that there is no change in the actual size of the p-i-c although they are the top layer. This programme is no longer supported by the makers, which is why I have turned to MEP. As you can see I like to use my p-i-c's at a 10 degree angle and would love to know if I can achieve this in MEP. I can do it with actual video but can I do it with an image.


Many thanks for your help so far

Frank

terrypin wrote on 1/10/2021, 10:57 AM

@Frank-Hough @johnebaker @AAProds
Hi Frank,

I’m not sure I understand. Your opening post asked how to zoom in on a specific part of an image. I took that to mean zooming in on a selected object (an image or a video) and that’s what I described. I think that’s what Alwyn and John did too.

But you’ve since introduced the two overlays or Picture in Picture images. Do you want to zoom in on one or both of those, leaving the background in track 1 unchanged?

Terry

Last changed by Scenestealer on 1/10/2021, 5:23 PM, changed a total of 3 times.

Reason: Removed blank space

Terry, East Grinstead, UK. PC: i7 6700K, 4.0 GHz, 32GB with Win 10 pro. Used many earlier versions of MEPP, currently mainly MEPP 2016 & 2017 (Using scores of macro scripts to add functionality, tailored to these versions.)

browj2 wrote on 1/10/2021, 12:08 PM

@Frank-Hough

Hi,

Further to what Terry mentioned, I noticed that you used Crop in the old version. That is now called Section.

If you crop using Section, you can uncheck full screen, then you can adjust the size and position under SizePosition and Rotation under rotation. If you don't uncheck full screen, then the cropped image becomes full screen, at least in one direction, and then you do the size/position rotation adjustments.

John CB

John C.B.

VideoPro X(16); Movie Studio 2025 Platinum; Music Maker 2025 Premium Edition; Samplitude Pro X8 Suite; see About me for more.

Desktop System - Windows 10 Pro 22H2; MB ROG STRIX B560-A Gaming WiFi; Graphics Card Zotac Gaming NVIDIA GeForce RTX-3060, PS; Power supply EVGA 750W; Intel Core i7-10700K @ 3.80GHz (UHD Graphics 630); RAM 32 GB; OS on Kingston SSD 1TB; secondary WD 2TB; others 1.5TB, 3TB, 500GB, 4TB, 5TB, 6TB, 8TB; three monitors - HP 25" main, LG 4K 27" second, HP 27" third; Casio WK-225 piano keyboard; M-Audio M-Track USB mixer.

Notebook - Microsoft Surface Pro 4, i5-6300U, 8 GB RAM, 256 SSD, W10 Pro 20H2.

YouTube Channel: @JCBrownVideos

johnebaker wrote on 1/10/2021, 12:18 PM

@Frank-Hough

Hi Frank

You can use the Rotation/Mirror effect to tilt the 10 deg or so - 3rd dial on the right.

As @terrypin and @browj2 have mentioned Section is an alternative, however it does have an odd behaviour if you apply rotation to then go back to adjust the section - it rotates back to horizontal while adjusting the section and the rotates back when you come out of the Section effect - annoying if you want to see what is happening while rotating.

You have a good taste in locations - one of my favourites in the UK.

John EB

Last changed by johnebaker on 1/10/2021, 12:22 PM, changed a total of 2 times.

VPX 16, Movie Studio 2025, and earlier versions 2015 and 2016, Music Maker Premium 2024.

PC - running Windows 11 23H2 Professional on Intel i7-8700K 3.2 GHz, 16GB RAM, RTX 2060 6GB 192-bit GDDR6, 1 x 1Tb Sabrent NVME SSD (OS and programs), 2 x 4TB (Data) internal HDD + 1TB internal SSD (Work disc), + 6 ext backup HDDs.

Laptop - Lenovo Legion 5i Phantom - running Windows 11 24H2 on Intel Core i7-10750H, 16GB DDR4-SDRAM, 512GB SSD, 43.9 cm screen Full HD 1920 x 1080, Intel UHD 630 iGPU and NVIDIA GeForce RTX 2060 (6GB GDDR6)

Sony FDR-AX53e Video camera, DJI Osmo Action 3 and Sony HDR-AS30V Sports cams.

Frank-Hough wrote on 1/10/2021, 2:01 PM

Hi John,

I seem to be getting everyone confused and may not have expressed my query enough. I think I know about Size/Position, Section and Rotation/Mirror. With the result as above using Size Position between 2 KFs. What I am after is getting my 2nd KF to have zoomed in as shown but with the image size remaining as in the 1st KF. As shown in my earlier comments and images, I have achieved this by using the Cookie Cutter. I was wanting to achieve the same effect by using p-i-c as above.

I guess from your last comment that you know the location I am using. I do thank everyone for their patience and help provided so far and I have learnt quite a lot in the last 24 hours.

Frank

browj2 wrote on 1/10/2021, 2:09 PM

@Frank-Hough

Hi Frank,

Could you please post a screen shot with the image selected and Size/Position and the keyframe area shown in the Media Pool.

Normally, to keep the same size/position, you just move along the timeline and press the + button to add a keyframe. This doesn't work if there is a kf further along the timeline on the same object so you do the above before adding another kf with changes. You can copy and paste keyframes.

Yours is a good example for us to play around with. There are usually several ways to do the same thing.

John CB

John C.B.

VideoPro X(16); Movie Studio 2025 Platinum; Music Maker 2025 Premium Edition; Samplitude Pro X8 Suite; see About me for more.

Desktop System - Windows 10 Pro 22H2; MB ROG STRIX B560-A Gaming WiFi; Graphics Card Zotac Gaming NVIDIA GeForce RTX-3060, PS; Power supply EVGA 750W; Intel Core i7-10700K @ 3.80GHz (UHD Graphics 630); RAM 32 GB; OS on Kingston SSD 1TB; secondary WD 2TB; others 1.5TB, 3TB, 500GB, 4TB, 5TB, 6TB, 8TB; three monitors - HP 25" main, LG 4K 27" second, HP 27" third; Casio WK-225 piano keyboard; M-Audio M-Track USB mixer.

Notebook - Microsoft Surface Pro 4, i5-6300U, 8 GB RAM, 256 SSD, W10 Pro 20H2.

YouTube Channel: @JCBrownVideos

johnebaker wrote on 1/10/2021, 2:44 PM

@Frank-Hough

Hi

Is this what you are looking for

@browj2 while doing the above the Load mask for effects do not appear to be working - they load onto the object but have no effect (tried various video mode settings) - can you check this please.

John EB

Last changed by johnebaker on 1/10/2021, 2:50 PM, changed a total of 1 times.

VPX 16, Movie Studio 2025, and earlier versions 2015 and 2016, Music Maker Premium 2024.

PC - running Windows 11 23H2 Professional on Intel i7-8700K 3.2 GHz, 16GB RAM, RTX 2060 6GB 192-bit GDDR6, 1 x 1Tb Sabrent NVME SSD (OS and programs), 2 x 4TB (Data) internal HDD + 1TB internal SSD (Work disc), + 6 ext backup HDDs.

Laptop - Lenovo Legion 5i Phantom - running Windows 11 24H2 on Intel Core i7-10750H, 16GB DDR4-SDRAM, 512GB SSD, 43.9 cm screen Full HD 1920 x 1080, Intel UHD 630 iGPU and NVIDIA GeForce RTX 2060 (6GB GDDR6)

Sony FDR-AX53e Video camera, DJI Osmo Action 3 and Sony HDR-AS30V Sports cams.

Frank-Hough wrote on 1/10/2021, 2:57 PM

@Frank-Hough

Hi Frank,

Could you please post a screen shot with the image selected and Size/Position and the keyframe area shown in the Media Pool.

Normally, to keep the same size/position, you just move along the timeline and press the + button to add a keyframe. This doesn't work if there is a kf further along the timeline on the same object so you do the above before adding another kf with changes. You can copy and paste keyframes.

Yours is a good example for us to play around with. There are usually several ways to do the same thing.

John CB


Frank-Hough wrote on 1/10/2021, 3:00 PM

John, is this the screenshot you want

Frank

Frank-Hough wrote on 1/10/2021, 3:02 PM

@Frank-Hough

Hi

Is this what you are looking for

@browj2 while doing the above the Load mask for effects do not appear to be working - they load onto the object but have no effect (tried various video mode settings) - can you check this please.

John EB


Frank-Hough wrote on 1/10/2021, 3:03 PM

Hi John, I think you have done the above with a mask which I am able to do. I am trying to obtain te same effect without using a mask.


Frank

johnebaker wrote on 1/10/2021, 3:09 PM

@Frank-Hough

Hi

. . . . I think you have done the above with a mask which I am able to do. I am trying to obtain te same effect without using a mask. . . .
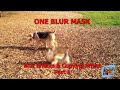
I have used a mask.

If you don't want the image to expand and possibly fill more of the background then a mask is necessary otherwise if you don't mind the image covering more of the background then just eliminate the mask.

Masks you cannot get away from them 🙂

John EB

Last changed by johnebaker on 1/10/2021, 3:12 PM, changed a total of 2 times.

VPX 16, Movie Studio 2025, and earlier versions 2015 and 2016, Music Maker Premium 2024.

PC - running Windows 11 23H2 Professional on Intel i7-8700K 3.2 GHz, 16GB RAM, RTX 2060 6GB 192-bit GDDR6, 1 x 1Tb Sabrent NVME SSD (OS and programs), 2 x 4TB (Data) internal HDD + 1TB internal SSD (Work disc), + 6 ext backup HDDs.

Laptop - Lenovo Legion 5i Phantom - running Windows 11 24H2 on Intel Core i7-10750H, 16GB DDR4-SDRAM, 512GB SSD, 43.9 cm screen Full HD 1920 x 1080, Intel UHD 630 iGPU and NVIDIA GeForce RTX 2060 (6GB GDDR6)

Sony FDR-AX53e Video camera, DJI Osmo Action 3 and Sony HDR-AS30V Sports cams.

terrypin wrote on 1/10/2021, 4:33 PM

@Frank-Hough @browj2 @johnebaker
You should insert your images in the one post, following the four steps I showed you.

Also as well as posting the screenshot John CB requested, it would make things clearer (at least to me!) if you showed what you want the video to look like at both the start and end of your zoom please.

Terry

Last changed by terrypin on 1/10/2021, 5:16 PM, changed a total of 2 times.

Terry, East Grinstead, UK. PC: i7 6700K, 4.0 GHz, 32GB with Win 10 pro. Used many earlier versions of MEPP, currently mainly MEPP 2016 & 2017 (Using scores of macro scripts to add functionality, tailored to these versions.)

browj2 wrote on 1/10/2021, 5:08 PM

@Frank-Hough

Hi Frank,

Beautiful photos!

No, your image is not quite what I was asking for, but close enough. You should have selected Size/Position as the effect so that we could see what the settings are.

You show 2 keyframes that I presume are the start and end of the animation.

So, what are the first and last kf's for? I presume that you are zooming in on the image.

If you want to hold the size/position position at the beginning kf longer, then select the kf and drag it to the right in the kf area until you get to where you want the second kf to start acting. Note that the first kf defines everything in the clip from its start to the kf.

In the image below, note that zoom is 42 and note the Left and Top positions. Everything up to the first kf has this size.

In the second image, playback is at the second kf and zoom is 46 and Left and Top (and Width and Ht) have changed. Movement starts at kf1 and goes to kf 2 over the duration between them. To keep the first one longer on the screen, simply drag kf1 to the right. If you want the start effect to be earlier, move it to the left. If you want the end kf earlier, drag it to the left. Etc.

Load Effects Mask

...the Load mask for effects do not appear to be working - they load onto the object but have no effect (tried various video mode settings) - can you check this please.

I presume that you are going to the dropdown button in the effect and selecting "Load effects mask." Correct?

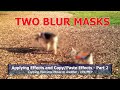
This is not what you should be doing. That is for using a mask to limit effects, like blurring, to the area inside or outside of the mask. The mask is applied only to one object. See the first tutorial at the end of this post.

Loading a Alpha Mask

Go to Templates tab, very bottom of Image objects, Layer masks, and drag the selected mask to the timeline onto a track between the two objects (background and foreground).

Now you can see the result of the mask. Note the downwards pointing arrow at the left of the mask. If I click on it, in changes to upwards and reverses the mask:

See my tutorials in which I show the two methods:

John CB

John C.B.

VideoPro X(16); Movie Studio 2025 Platinum; Music Maker 2025 Premium Edition; Samplitude Pro X8 Suite; see About me for more.

Desktop System - Windows 10 Pro 22H2; MB ROG STRIX B560-A Gaming WiFi; Graphics Card Zotac Gaming NVIDIA GeForce RTX-3060, PS; Power supply EVGA 750W; Intel Core i7-10700K @ 3.80GHz (UHD Graphics 630); RAM 32 GB; OS on Kingston SSD 1TB; secondary WD 2TB; others 1.5TB, 3TB, 500GB, 4TB, 5TB, 6TB, 8TB; three monitors - HP 25" main, LG 4K 27" second, HP 27" third; Casio WK-225 piano keyboard; M-Audio M-Track USB mixer.

Notebook - Microsoft Surface Pro 4, i5-6300U, 8 GB RAM, 256 SSD, W10 Pro 20H2.

YouTube Channel: @JCBrownVideos

Scenestealer wrote on 1/10/2021, 5:14 PM

@terrypin @Frank-Hough

Hi Terry

....it would make things clearer (at least to me!) if you showed what you want the video to look like at both the start and end of your zoom please.

I think he has in his first post with SShots, in MoviePlusX6, although in the end shot on the right the PinP section has perhaps inadvertently grown a little and changed aspect ratio, as well as zooming the subject.

Peter

Last changed by Scenestealer on 1/10/2021, 5:33 PM, changed a total of 1 times.

System Specs: Intel 6th Gen i7 6700K 4Ghz O.C.4.6GHz, Asus Z170 Pro Gaming MoBo, 16GB DDR4 2133Mhz RAM, Samsung 850 EVO 512GB SSD system disc WD Black 4TB HDD Video Storage, Nvidia GTX1060 OC 6GB, Win10 Pro 2004, MEP2016, 2022 (V21.0.1.92) Premium and prior, VPX7, VPX12 (V18.0.1.85). Microsoft Surface Pro3 i5 4300U 1.9GHz Max 2.6Ghz, HDGraphics 4400, 4GB Ram 128GB SSD + 64GB Strontium Micro SD card, Win 10Pro 2004, MEP2015 Premium.

Frank-Hough wrote on 1/11/2021, 6:34 AM

@terrypin @Frank-Hough

Hi Terry

....it would make things clearer (at least to me!) if you showed what you want the video to look like at both the start and end of your zoom please.

I think he has in his first post with SShots, in MoviePlusX6, although in the end shot on the right the PinP section has perhaps inadvertently grown a little and changed aspect ratio, as well as zooming the subject.

Peter