Installation procedure for "Contour ShuttlePro v2"
Products
- . Video deluxe
- . Video Pro X
Topic
- . Download & installation
In order to install your Contour ShuttlePro v2, proceed as follows:
- Connect your Contour Shuttle v2 to a free USB port.
- Download the driver from the following download (Win 10, 8, 7)
Download "Contour Shuttle Pro 2" driver
- Unpack the driver and install it.
- Restart your computer.
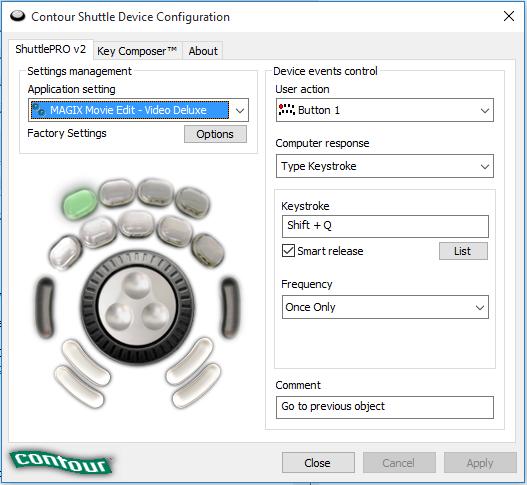
- Open the Shuttle configuration: Programs -> Contour Shuttle -> Shuttle Configuration.
- Now select the corresponding preset: "MAGIX Movie Edit Pro - Video deluxe" - "Video Pro X".
- Accept the settings (Apply) and close the program (Close).
- Start the software and open a project.
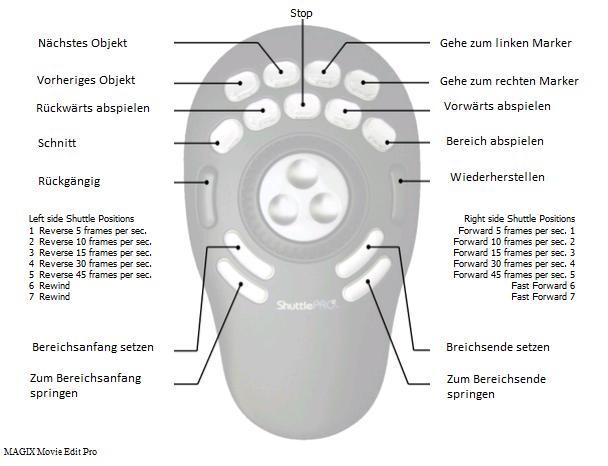
- Test your Shuttle Pro v2
Shuttle Hot key configuration (Movie Edit Pro - Video deluxe)
- Open the Shuttle Configuration: Programs -> Contour Shuttle -> Shuttle Configuration and select the template "MAGIX Movie Edit - Video Deluxe".
- Select "Jog left" under User Action and click with the mouse in the field under "Keystroke" -> Now press the left "arrow key" of your keyboard.
- Select "Apply".
Please apply the same steps for "Jog right", of course with the arrow to the right. Click on "Apply" and "OK" or "Close".
Shuttle Hot key configuration (Video ProX)
- Select "MAGIX Video Pro X" from the application settings menu.
- Click on "Options > Create new settings > Copy contents from current Settings". The window "Target application selection" will open up.
- Select video_pro_x.exe in the folder C:\ProgramFiles\MAGIX\Video Pro X.
- Start Video Pro X and check if the device works correctly.


